Add a text box to your slide that includes one or more placeholders, each of which is replaced at runtime with values selected from a slicer or built dynamically by applying a PQL expression to the value selected from the slicer. For example, you might want to update a title you have added to your slide to reflect the country name that is currently selected from your slicer, or you might want to use PQL to return some information from the internet about the selected country and replace a different placeholder with that content.
Placeholders typically help you to use text on your slide to make sense of the analytic information that your visuals represent.
The dynamic functionality described in this topic allows you to show text that reflects slicer selections on your slides. Other options allow you to replace variables with information about your presentation, pull data from matrix grids into text fields, or incorporate dynamic infographics from Illustrate.
- Click here for more about dynamic assets
Configuring dynamic placeholders
You can add placeholders to text boxes so that they can be replaced at runtime either with values from your slicer or with values that are derived from those selections. You can use PQL Dynamic or Common expressions to build the custom functionality that transforms selected slicer values into other values or formats it by applying markup.
Step 1: Add a Text Box
Add a basic text box to your canvas, creating the basic text field that will include or be replaced by your placeholders.
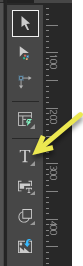
From the Toolbox:
- Click Text (yellow arrow).
- Click the canvas at the point where you would like to add your text box.
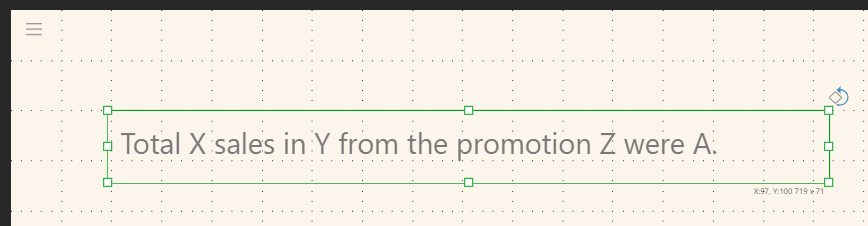
- Type your text into the text box:
A standard-sized text box opens on the canvas.
Total X sales in Y from the promotion Z were A.
Tip: You can select the text box and click Graphic Text from the Component ribbon to allow the text (including the placeholders) to be resized by resizing the text box.
Note: This example uses placeholders to reflect your slicer selections. If you go on to create dynamic text, the example will replace the final temporary value with a dynamic value.
Step 2: Add placeholders to your text
These placeholders are the values that will be replaced with slicer elements on selection.
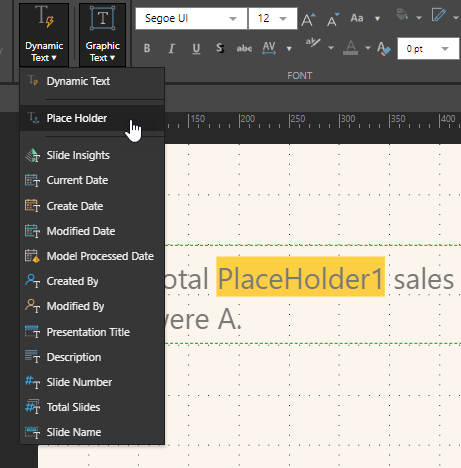
Replace any temporary values in your text (X, Y, and Z) with placeholders as follows:
- Delete the temporary value (X, Y, or Z).
- With your cursor in the sentence at the correct position, click Dynamic Text > Place Holder from the Component ribbon.
- Repeat as required.
If you were to launch the presentation at runtime, your placeholders would not be visible on the slide. This is because there is nothing to replace the placeholders with at this stage.
Step 3: Format your text (optional)
It is important to think about the data that will be returned from your function. Will it be the value from the slicer, a Boolean, or a paragraph derived from the slicer value? You should format and resize your text and text box accordingly!
You can format the text by resizing the text box, moving it to a more appropriate location on the canvas, changing the font formatting, and so on. As with any other content item, you can use the standard editing options on the right-click menu, the component ribbon, and the canvas to manage your text formatting.
- Click here for more about canvas options (resize, move, and so on)
- Click here for more about formatting from the Component ribbon
Step 4: Create slicer to placeholder interactions
Create interactions between the slicers and the placeholders whose values they should drive.
From the Presentation ribbon:
- Open Interaction Manager and select the checkbox at the intersection between the slicer and its placeholder.
- Select the Interaction Picker and click and drag from a slicer to its placeholder to create an interaction.
Tip: If you have Show Interactions enabled, you need to toggle the option off from the ribbon before you can continue editing.
- Click here for more information about interactions
The following example shows interactions between the Product Category slicer and PlaceHolder1 (orange arrow), Country and PlaceHolder2 (purple arrow), and Promotion Type and PlaceHolder3 (green arrow):
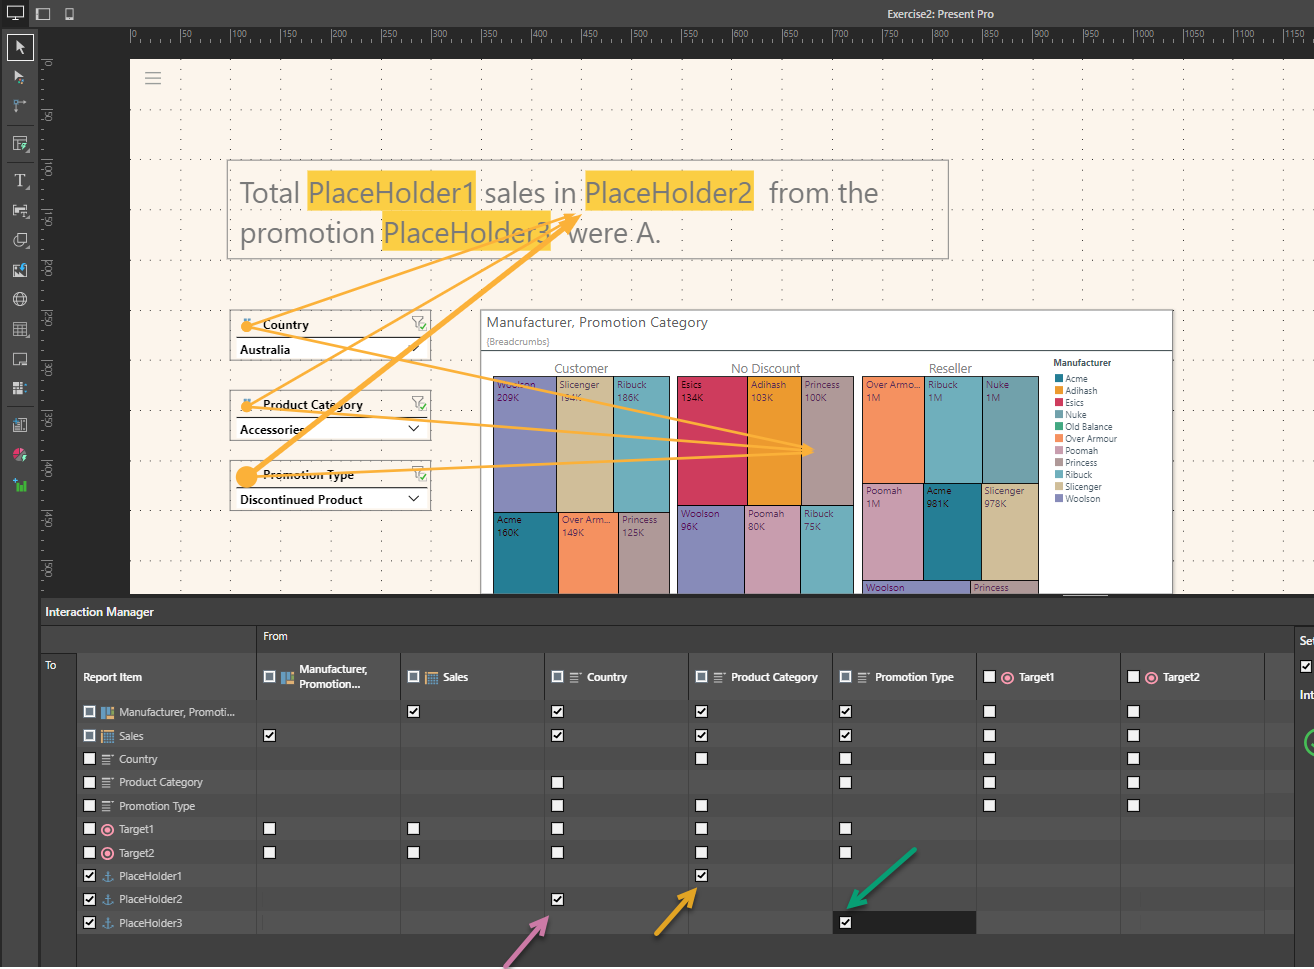
Note: If you save and run your presentation at this point, the selections you make from your slicers will replace the placeholders at runtime. For example, selecting United States from the country slicer will cause Placeholder2 to be replaced with the text "United States."
Step 5: Customize your function (optional)
You can use a PQL expression that underlies your interaction to customize its behavior. You can create a PQL expression that adds markup to your content or that manipulates the result before it is used. The available PQL libraries that you can use are Common and Dynamic.
On the canvas:
- Select the Placeholder inside the text box.
- Optionally, rename your placeholder to be more informative.
- Update the formula to enable custom behavior as per your requirements.
The following example shows the use of the
If()statement to either replace the value "United States" with "USA" or to replace any other selection with an upper case, three-character sub-string of the value selected from the slicer:If(value() = "United States", "USA", ToUpper(SubString(value(), 0, 3)))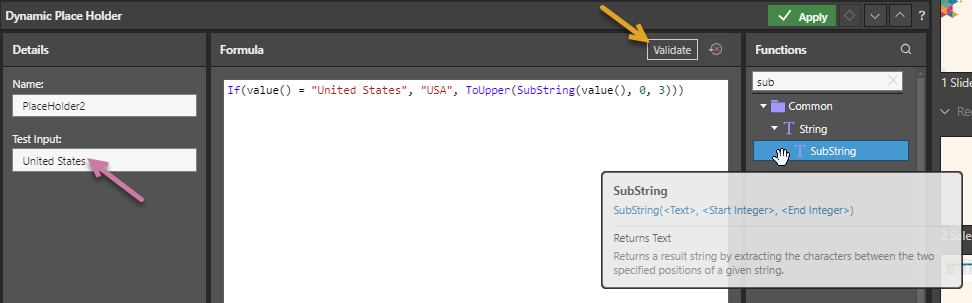
- Click here for more worked examples of PQL expressions
- Test that the formula behaves as expected by entering a valid value into the Test Input field (purple arrow above) and clicking Validate (orange arrow):
- Once you are happy with your function, click Apply and then Save your presentation.
This opens the Dynamic Placeholder panel at the bottom of the page. Note that the formula is value() by default.

For example, you might want to call the placeholder "Country" or something similar.
Tip: You can see a description of each available function, including syntax, by hovering your cursor over the item in the Functions tree. You can also double-click the function in the tree to copy it into the formula panel.

The green strip indicates that the expression was validated successfully. The text shown in the strip is the output returned when validating the expression with the test input.

Step 6: Check your placeholder replacements at runtime
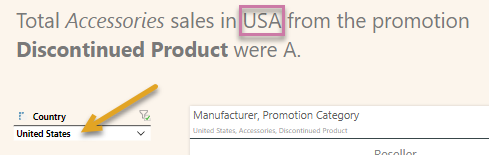
You should always check that your changes have the effect you intended. Open the presentation at runtime by clicking Run or F2 and update the options on your slicer to check that the contents of the placeholders respond as expected. For example, select United States from the Country dropdown list to update the name of the country with USA:
Dynamic placeholder PQL examples
You can customize your placeholders using PQL from the Common and Dynamic libraries:
The functions in the Dynamic library can be used to apply Markup to your value, for example, you can use Italics(value()) to transform the returned value into italic text. The functions in the Common library can be used to manipulate the returned value, for example, you can use LLM("who is the prime minister of" + value()) to use the underlying LLM to return a long-form text description of the prime minister of the selected country.
In the Dynamic placeholder field, select the values() function and then double-click the Bold() function to produce the following function:
Bold(value())

Create an interaction from the Promotion Type slicer to PlaceHolder3:

At runtime, make a selection from the slicer. Your selection is used to replace PlaceHolder3 and is bolded:

Use the AI-driven LLM PQL function from the Common PQL functions to generate dynamic text and use that text to replace the placeholder. While this function cannot tell you about your data set, it can add additional information and background to your presentation. Your results are generated using an underlying LLM (such as OpenAI's ChatGPT).
Note: You can only make use of this functionality if your administrator has selected to Enable Generative AI in the AI Settings page of the Admin Console. Otherwise, the function is not available for use.
Warning: When using LLMs, your assets are generated using public domain algorithms. This can produce erroneous and inconsistent or random results. Use at your own risk.
For this type of placeholder replacement, you need to ensure your target (containing the placeholder) is a large enough text box to contain your results:

In the Dynamic placeholder field, use the LLM() function to specify that you want your results to return the name of the prime minister from the selected country:
Image("<url>.png") + Bold(LLM("who is the prime minister of" + value()))
At runtime, make a selection from the source slicer. Your selection will be used to replace PlaceHolder4 with an Image() and a paragraph of text from the LLM that describes the prime minister of the selected country:

Note: This example shows why AI-driven responses are so powerful. Even where the request does not make sense for the given region (there is no American prime minister), the response may be meaningful to your user.